Last night I made some delicious spinach -- with just a little butter. I had two bunches of organic spinach from last week's co-op delivery. And it looked beautiful! But, of course, dirt clung to the stems and leaves. This used to be daunting to me -- I've cooked one too many gritty spinach dishes. But no more! And with this cooking tip from the good doctor, yes my husband does know a thing or two in the kitchen, I'll share my secret to no-grit spinach.
First, do a preliminary wash of your spinach. Cut the stems off and wash again. Now here comes the key part: get a large bowl -- I use a giant plastic tupperware bowl that I bought 20 years ago. Fill it with salted water -- I dump about 1/4 c. of salt per 3 to 4 quarts of water. Stir to dissolve the salt. Then submerge your spinach. Let it sit for about 5 minutes. Then gather the spinach with your hands and rinse in the sink. If you look in the bottom of the bowl, you'll see all the dirt bits on the bottom! Yay salt (which makes it do that). Now pour out the salted water (and dirt) and rinse the bowl.
We're not done yet. Repeat the process with the salt and water in the big bowl with that same bunch of spinach. Let it sit for 5 minutes and then rinse. Now you're ready to cook the spinach however you desire. No grit, not too much fuss. Bon Appetit!
Friday, September 30, 2011
Tuesday, September 27, 2011
Maker's Sweet Potatoes
I've dubbed this sweet potato dish "Maker's Sweet Potatoes." Here the "Maker" is God (Maker of all sweet potatoes), but also the whiskey that he inspired down yonder in Kentucky -- Maker's Mark (the jewel of all whiskeys). Can you tell I've jettisoned my wine in favor of the hard stuff?
Actually the recipe is taken from Virginia Willis' Bon Appetit Y'all. I think Virginia must be a cousin of mine from my granddaddy's Atlanta roots because I am severely in love with all of her recipes. It must be in the Atlanta blood -- like Coca-Cola.
I served these along with the Swiss chard on the previous post and some of that great grass-fed ribeye from the co-op. I also made a killer horseradish sauce to serve on the beef. That recipe might show up tomorrow!
NOTE: These are so good that double portions can be made for dessert!! And my non-bourbon loving kids loved them.
Virginia Willis' Bourbon Sweet Potatoes
Ingredients:
1/2 stick of butter
4 to 6 sweet potatoes, peeled and cut into 1/2-inch slices
Sea salt and freshly ground pepper
1/2 cup firmly packed brown sugar
1/2 cup bourbon (Maker's Mark is gluten free!!)
2 tablespoons of maple syrup
Make it!
Preheat the oven to 350 degrees. Butter a casserole dish. I used my Le Creuset oval casserole dish. Arrange the slices of sweet potato around the casserole. Season with salt and pepper.
In a large sauce pan, combine the sugar, 4 tablespoons of butter, bourbon, and syrup and bring to a boil. Use a LARGE sauce pan because I used a small All-Clad saucepan, and I had FLAMBÉ going on when the mixture came to a boil. Not clever. So use a big and deep pan. As soon as the sauce is boiling, pour it over the sweet potatoes.
Bake the casserole, basting and turning the potatoes occasionally, until the potatoes are tender. This should take about 60 minutes (even in my convection oven). Adjust your seasonings and eat it up!!

Cheers! It's 5 o'clock somewhere!

The finished product -- definitely a bit of heaven!!
Early Fall Chard Sauté
Two bunches of Swiss chard appeared in last Friday's co-op delivery, so I used one bunch for this yummy and easy, and gluten-free, side dish that pairs well with any kind of beef, chicken or pork. These greens are barely cooked and flavored with delicious apple cider vinegar for the perfect "bite!" Swiss chard is also super nutritious and gives your family some variation from the oft-used Broccoli and Carrots!
Swiss Chard Sauté
Serves 4
Ingredients:
1/4 cup good-quality olive oil
1 cup of thinly sliced shallots
2 garlic cloves, crushed
1-1/2 - 1-3/4 lb. of Swiss chard with stems removed and thinly sliced; leaves chopped.
1/4 cup apple cider vinegar (I use Bragg's -- organic and gluten free)
2 tablespoons unsalted butter
Sea salt and freshly ground pepper
How To:
Heat oil in a large heavy pot (I use Le Creuset all the way!) over medium heat. Add shallots and garlic. Cook, stirring often, until soft -- about 5 minutes. Add Swiss chard stems and saute for another 2 minutes. Add chard leaves and cook, stirring frequently, until they are crisp-tender and bright green (about 4 or 5 minutes). Stir in the apple cider vinegar. Add butter, toss until melted and then season with salt and pepper.

Sauté the shallots and garlic in 1/4 cup of olive oil

add sliced chard stems

add chopped chard leaves

cook until greens wilt

add apple cider vinegar and cook for a bit

Finished product served with ribeye and candied bourbon sweet potatoes.
Monday, September 26, 2011
Bless this food
Hi! I'm still here. Just very, very busy. My free time has been used for surfing, as the water has been perfect (although tiny surf) and it is what stirs and renews my soul.
This week has been nothing short of chaotic. 2 birthdays, a very sick kid and not enough time in each day to get it all done. We sat down together for a home cooked meal maybe twice. I did bake a cake for one of the birthdays. We also BBQ'ed some baby back ribs and chicken last weekend. It was so good! We have figured out the secret to good ribs. Use a rub, (we use Stubb's BBQ Spice Rub. We also use Stubb's Original Recipe BBQ sauce....The best!) then set the ribs on the top shelf of the grill, bone side down, and cook on low with the grill cover down for 45 minutes. Then flip them and cook for 15 more minutes. Perfect every time.

I got a glass of wine and hit the hammock while it cooked. It was very relaxing....

And then the grill caught on fire. (sigh) The chicken skin got burned but the meat was fine. The ribs were not burned, thank goodness. I peeled the skin off the chicken and used the meat the rest of the week for lunch sandwiches.
Just keeping it real folks. Life is messy sometimes and dinner sometimes gets charred. Blame the wine.
I also made some chicken noodle soup for my sick one! It didn't burn. It was good. Instead of using the slender egg noodles, I broke up lasagna noodles into 1-2 inch pieces. Very satisfying. I could tell you this was planned, an Italian family secret....but actually I was out of egg noodles. Do you hear a theme with me?
The recipe is done by feel. I boiled chicken (this day I used boneless, skinless chicken breasts), and then cubed it and added it back to the water. I then added chicken bouillon granules, carrots and onion. Celery is good too, but I was out. If you have the time, a whole chicken boiled is best. You get the yummy flavor from the fat and bones that you can't get with bouillon. But I was time crunched again. Cook on medium until carrots are almost done, then add the noodles. An easy, quick meal. I sprinkle grated Parmesan cheese top. Mmm.
I am hoping this week is slower. Football will be down to 3 practice nights a week so we will be able to sit down as a family at least twice during the school week. The weekend will be pure chaos with surf contests and football games, so it may be dinner out.
At least tonight we were all home and nothing got burned. I made soft tacos with ground beef (chicken for me), guacamole and veggies on flour tortillas. Be creative with the veggies. I chopped up some savoy cabbage today. Also, cilantro, jalapenos, red pepper and tomato. I sautéed some chicken tenders and put them in the fridge for easy chicken sandwiches and wraps during the busy week. Multi-tasking.
This is the best sight in the world to me. My whole family sitting at the table together. The older the kids get, the more activities they get involved with, and the less I see this. It pains this mamas heart. But I take what I can get. God is good, God is great, let us thank Him for our food. Amen

This week has been nothing short of chaotic. 2 birthdays, a very sick kid and not enough time in each day to get it all done. We sat down together for a home cooked meal maybe twice. I did bake a cake for one of the birthdays. We also BBQ'ed some baby back ribs and chicken last weekend. It was so good! We have figured out the secret to good ribs. Use a rub, (we use Stubb's BBQ Spice Rub. We also use Stubb's Original Recipe BBQ sauce....The best!) then set the ribs on the top shelf of the grill, bone side down, and cook on low with the grill cover down for 45 minutes. Then flip them and cook for 15 more minutes. Perfect every time.

I got a glass of wine and hit the hammock while it cooked. It was very relaxing....
And then the grill caught on fire. (sigh) The chicken skin got burned but the meat was fine. The ribs were not burned, thank goodness. I peeled the skin off the chicken and used the meat the rest of the week for lunch sandwiches.
Just keeping it real folks. Life is messy sometimes and dinner sometimes gets charred. Blame the wine.
I also made some chicken noodle soup for my sick one! It didn't burn. It was good. Instead of using the slender egg noodles, I broke up lasagna noodles into 1-2 inch pieces. Very satisfying. I could tell you this was planned, an Italian family secret....but actually I was out of egg noodles. Do you hear a theme with me?
The recipe is done by feel. I boiled chicken (this day I used boneless, skinless chicken breasts), and then cubed it and added it back to the water. I then added chicken bouillon granules, carrots and onion. Celery is good too, but I was out. If you have the time, a whole chicken boiled is best. You get the yummy flavor from the fat and bones that you can't get with bouillon. But I was time crunched again. Cook on medium until carrots are almost done, then add the noodles. An easy, quick meal. I sprinkle grated Parmesan cheese top. Mmm.
I am hoping this week is slower. Football will be down to 3 practice nights a week so we will be able to sit down as a family at least twice during the school week. The weekend will be pure chaos with surf contests and football games, so it may be dinner out.
At least tonight we were all home and nothing got burned. I made soft tacos with ground beef (chicken for me), guacamole and veggies on flour tortillas. Be creative with the veggies. I chopped up some savoy cabbage today. Also, cilantro, jalapenos, red pepper and tomato. I sautéed some chicken tenders and put them in the fridge for easy chicken sandwiches and wraps during the busy week. Multi-tasking.
This is the best sight in the world to me. My whole family sitting at the table together. The older the kids get, the more activities they get involved with, and the less I see this. It pains this mamas heart. But I take what I can get. God is good, God is great, let us thank Him for our food. Amen

Tuesday, September 20, 2011
Heavenly Pie

The recipe straight out of the YWCA Cookbook, circa 1968.

The remnants of Julia Ann's amazing pie.

My attempt at the same pie earlier in the week. This picture is taken with the whipped cream/lemon curd filling and whipped cream topping. SINFUL!

This is what the crust looked like on my pie. Total meringue.
This is a gluten-free pie crust and a darn good gluten-free pie.
Heavenly Pie
I made a pie three days before we left to go visit my MIL. It was this one.
When we arrived in Arkansas, we were fed a luscious dinner of shrimp creole and...you guessed it...this very same pie.
My recipe was less than stellar, which I got from a test kitchen magazine. My mother-in-law's was perfect, and came from a cookbook printed the year my brother was born. So this makes it an oldie, but a reeeeeeeeeeeal goodie!!
Here is her recipe from the 1968 YMCA Pine Bluff Cookbook. I'm trying to track down an extra copy of this awesome cookbook, so shout out if you know where I can find one!!! And if you make this scrumptious pie, let us know!!
**As an addendum, I was told to let the pie crust sit in a warm oven for up to 3 hours after baking it.
Meatloaf Day Two
Since I failed to take a picture of the finished meatloaf from last night, I offer you a nice shot of the lovely meatloaf sandwich I had today. Udi's white gluten-free bread, HEB Ketchup (no HFCS), homemade mayonnaise and a thick slab of last night's meatloaf. My oldest daughter had two large sandwiches. That's a compliment!

Sandwich perfect!

All that was left of last night's meatloaf!
Monday, September 19, 2011
Meatloaf Monday!

Meatloaf BEFORE putting it in the oven.
Everyone was so hungry I forgot to take a picture of the finished product! But it was lovely!!
We're back home after a trip to see my hubby's family in Arkansas. My MIL fed us extremely well, and I promise to duplicate her recipes in upcoming posts so you all can "get poned up" on yummy cooking! But in the meantime, it's back to the usual routine, and tonight it's Meatloaf Monday.
My husband is a physician, and he works his fingers to the nubbins on Mondays -- too many patients and too little time. So after a hard day, I like to treat him to a meal that "sticks to his ribs." Meatloaf is the perfect follow-up to our pre-dinner Maker's Mark and ginger ale!!
Keep in mind that locating a gluten-free meatloaf recipe is kind of like trying to find a dish that's gluten-free in an Italian restaurant. Almost impossible! But I concocted this yummy recipe using oatmeal and bratwurst -- it's a winner. I've tried it with turkey, and I've tried it with ground beef. Both were delicious and made even tastier sandwiches the next day.
Monday Meatloaf (or any day of the week!)
Ingredients
3/4 cup quick-cooking oats (Bob's Red Mill is gluten free)
1/2 cup milk
1 medium onion, peeled
2 pounds of ground beef or turkey
2 links of bratwurst taken out of the membranes
2 eggs beaten
1/2 c. chopped bell pepper (green or red is ok)
2 teaspoons Worcestershire sauce
1/4 cup ketchup
1/2 teaspoon salt
Freshly ground pepper
8 oz. tomato sauce (to pour over the top -- don't mix it in the meat!)
Directions
Preheat the oven to 350 degrees F.
In small bowl, stir together the oats and milk. Let it sit for about 10 minutes. Meanwhile, thinly slice 1/4 of the onion and set aside. Chop the remaining onion into small bits.
In a large bowl, combine the meat, sausage, oat mixture, chopped onion, bell pepper, eggs, Worcestershire sauce, ketchup, salt and a few grinds of the black pepper. Mix until well combined.
Transfer mixture to one 9 x 13 pan, sprayed with cooking oil. Pour the tomato sauce over the top of the loaf. Then sprinkle the sliced onions on top. Bake at 350 degrees F for about 1-1/2 hours (in my convection oven) or until a meat thermometer registers 160 degrees F.
Remove from the oven and let rest for 10 to 15 minutes before serving.
I served this with buttermilk mashed potatoes and asparagus. Most of it was eaten by this family of four!
Monday, September 12, 2011
Thyme (or not) Sauteed Pork Chops with Apple Slices
I am not a big pork lover. Never have been. I would rather have beef ribs over baby backs, and forget pork chops!! Or so I thought.
Last weekend I did all of my shopping for the coming week. I didn't plan out my menus in advance, but sort of decided in my head on the way to the grocery store which meats I would need and the veggies to go with them. Pork was not part of the plan. It was pure Texas beef dancing in my brain.
When I shop, the only food that is not fresh, is frozen. I get coffee, ice cream, some frozen veggies, yogurt, butter, eggs, cereal, pasta, bread, fresh veggies and fruit, meat and cheese. I tend to stock up every other month on things like sugar, flour, and other baking goods and spices. I rarely buy processed foods.
Where was I with pork? Oh yes. We are not big pork fans, but at the beginning of the summer we made some slow cooked Baby Back ribs and they were to die for. Best ribs evah! So when I passed the pork chops in the meat section, I decided to give them a try as well.
I got out my Martha Stewart cookbook that Pam had given me back in 1997 after a fun visit to our home with her two girls. I found a recipe calledThyme-Sauteed Pork Chops With Apple Slices and set to work. It was a very simple recipe:
1/2 cup all-purpose flour
Coarse kosher salt and freshly ground pepper to taste
8 thin pork loin chops
4 Tbs unsalted butter
4 Tbs olive oil
16 springs of fresh thyme
2 Granny Smith apples or McIntosh apples, unpeeled, cut in 1/4 inch slices
Okay, so I did not use the thyme. Didn't have it, so turned a blind eye to it. It's how I roll.
Season the flour with the salt and pepper to taste, then lightly dredge the chops in the flour. Heat the butter and oil in a large skillet. Saute the chose for 5 minutes on each side. When they are done, use the same skillet to saute the apple slices 2-4 minutes or until soft but not mushy.
If you have thyme, you place the sprigs under each chop while it is cooking so the springs will stick to the meat. But I didn't have thyme. So there.
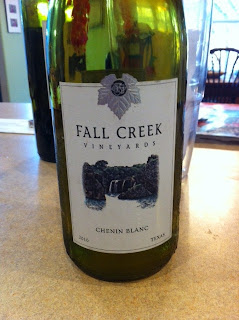
I served this with glazed carrots and peas with an Herb Garden spring salad and Fall Creek Vineyards Chenin Blanc.
It was soooo yummy.
Oh, and so was this:

Kids ate it up. My two oldest sons have very distinct dislikes One hates peas. The other hates carrots. Easy fix since I was serving both. I swithced their plates though before they sat down and they were both "Really mom?????"
I have to say, that as simple as that recipe may sound, it has changed my feeling for pork chops. I think it was the half stick of real butter. In addition to the butter in the carrots, my arteries clogged just watching it all cook.

Next time, I will share our secret for perfect baby back ribs!
Last weekend I did all of my shopping for the coming week. I didn't plan out my menus in advance, but sort of decided in my head on the way to the grocery store which meats I would need and the veggies to go with them. Pork was not part of the plan. It was pure Texas beef dancing in my brain.
When I shop, the only food that is not fresh, is frozen. I get coffee, ice cream, some frozen veggies, yogurt, butter, eggs, cereal, pasta, bread, fresh veggies and fruit, meat and cheese. I tend to stock up every other month on things like sugar, flour, and other baking goods and spices. I rarely buy processed foods.
Where was I with pork? Oh yes. We are not big pork fans, but at the beginning of the summer we made some slow cooked Baby Back ribs and they were to die for. Best ribs evah! So when I passed the pork chops in the meat section, I decided to give them a try as well.
I got out my Martha Stewart cookbook that Pam had given me back in 1997 after a fun visit to our home with her two girls. I found a recipe called
1/2 cup all-purpose flour
Coarse kosher salt and freshly ground pepper to taste
8 thin pork loin chops
4 Tbs unsalted butter
4 Tbs olive oil
16 springs of fresh thyme
2 Granny Smith apples or McIntosh apples, unpeeled, cut in 1/4 inch slices
Okay, so I did not use the thyme. Didn't have it, so turned a blind eye to it. It's how I roll.
Season the flour with the salt and pepper to taste, then lightly dredge the chops in the flour. Heat the butter and oil in a large skillet. Saute the chose for 5 minutes on each side. When they are done, use the same skillet to saute the apple slices 2-4 minutes or until soft but not mushy.
If you have thyme, you place the sprigs under each chop while it is cooking so the springs will stick to the meat. But I didn't have thyme. So there.
I served this with glazed carrots and peas with an Herb Garden spring salad and Fall Creek Vineyards Chenin Blanc.

It was soooo yummy.
Oh, and so was this:

Kids ate it up. My two oldest sons have very distinct dislikes One hates peas. The other hates carrots. Easy fix since I was serving both. I swithced their plates though before they sat down and they were both "Really mom?????"
I have to say, that as simple as that recipe may sound, it has changed my feeling for pork chops. I think it was the half stick of real butter. In addition to the butter in the carrots, my arteries clogged just watching it all cook.

Next time, I will share our secret for perfect baby back ribs!
Saturday, September 10, 2011
Saturday Sandwiches Part One: Homemade Mayonnaise
Every Saturday, we can usually be found eating sandwiches for lunch. Of course, the bread is Udi's Gluten-Free, either White or Multi-Grain. But their bread is so good, you'd never know it doesn't have gluten. In fact, my older daughter, who doesn't have celiac, loves Udi's -- and she's very picky. We buy it frozen and just stick it in the fridge for fresh bread at any time.
Today's sandwiches are Cucumber and Pimento Cheese. My MIL Julia Ann taught me how to make cucumber sandwiches just a few months ago. This is yet another favorite that it took me 46 years to finally experience! Go figure.
The pimento cheese sandwich is also new to the repertoire. My youngest daughter always used to have an allergic reaction to Price's Pimento Cheese spread, so I quit buying it about 13 years ago. I recently ran across a recipe in a beloved cookbook, and I decided to give it a try -- homemade without any of the artificial gunk used in commercial spreads. So let's begin.
Start with HOMEMADE MAYONNAISE!! All you need is a food processor. There are numerous ways to make mayo at home, but for fool-proof mayo, you MUST have a food processor. I have a Cuisinart, which has a feed tube with a tiny hole in the bottom which is expressly used to add oil to salad dressings and MAYONNAISE! Julia Ann is a big fan and maker of homemade mayo, and this is another tradition I am swiping for my own kitchen.
Homemade Mayonnaise
1 c. of canola oil (I use Wesson) at room temperature
2 large egg yolks
Juice from 1/2 lemon
1 teaspoon of dijon mustard
Put the egg yolks, lemon juice and mustard in food processor bowl. Pulse for 10 seconds. Then turn on the processor and add all the oil to the feed tube. Keep it going until all the oil has run through the tube into the mixture. Season with salt and pepper. Then remove the mayonnaise from the work bowl and put into an airtight container. This will keep for a couple of days.
 The finished product -- thick and glossy with specks of pepper. YUM!
 This is what your mayo looks like when it's ready to put into an airtight container.
  Notice the biscuit-colored feeding tube at the top of the Cuisinart attachment. That's where you put the oil, which will then drizzle slowly in the mix. This feeding tube is the secret to perfectly incorporating oil into the egg, mustard and lemon juice.
Now you're all set to make sensational salad dressings, sandwich spreads, potato salad, cole slaw, chocolate mayo cake...the sky is the limit!! So make that mayo, and we'll do the sandwiches tomorrow.
Coming tomorrow: Part Two with recipes for the Pimento Cheese and Cucumber Sandwiches
Southerners and Bourbon
When I taste bourbon I think of my mother's bourbon cakes that she used to make for Christmas. And when I was diagnosed with celiac, bourbon was suddenly out of the picture. As well as cakes.
But these days, I've found ways to make delicious gluten-free cakes. And I recently found a gluten-free bourbon. Maker's Mark -- it's top drawer (as cousin Scott would say!).
I reported recently via social media that I was enjoying a Maker's Mark and Ginger Ale. I was roundly scolded by my bourbon purist friends (all of them fellow Church members!). But I don't care. I can't drink the stuff neat. So I am enjoying a nice tall glass of Maker's Mark, crushed ice and Vernors ginger ale. Perfection. Especially on a warm Texas night.
Here's another variation on the Bourbon and Ginger Ale. I need to try this soon :)
Friday, September 9, 2011
Cornbread: Bacon Grease vs. Butter
Last night was a redux of Monday night...I made the vegetable soup again to use up the rest of my vegetables in the fridge. Co-op delivery day is every Friday, and it's a personal goal to use up the previous week's veggies before the next one arrives. In addition, my stomach was feeling a little rocky because of the previous night's dinner at a neighborhood bistro (see below): Chipotle Shrimp Scampi. Totally delicious and totally gluten free! Grilled shrimp swimming in chipotle butter with red pepper risotto and grilled squash on the side. Beyond sinful!!! Hence the need for a soothing soup last night!

Now I am finally getting around to the bacon grease -- in a roundabout way. For Monday night's dinner, I made the cornbread with butter instead of bacon grease. I thought the taste was good, but a little flat. So for last night's dinner, I whipped up another batch of cornbread, but this time used butter AND bacon grease.
First, I must discuss bacon grease. I was raised, as my sister can attest, in a home where my mom was afraid of food spoilage, contamination and salmonella. Consequently, the bacon grease container (a Folger's coffee can) at my folks' house was considered garbage on the stove (since you cannot throw grease down the drain). My mother and her older sister Margaret were pioneers in the days of "cooking light," and I don't believe I ever tasted a dish they made that contained bacon grease. Ever.
Fast forward to present day. My mother-in-law, Julia Ann, who is ten years older than my mom, is a proponent of homemade mayonnaise and bacon grease (two things I never consumed in my life).
I remember the first time I saw her use bacon grease to flavor a dish. I watched in horror as she scooped bacon grease out of the glass jar that sits by my range and dumped it into the bowl. But you know what? I let it ride, and I let her cook the dish. And no surprise, it was perfect! Simply delicious! And that bacon grease didn't kill me! WOW!! Food epiphany for Pam!!
Last night, I decided to taste-drive the bacon grease cornbread. Here are my ingredients:

1 T salted butter
1 teaspoon baking soda
1 teaspoon fine ground sea salt
1 egg (slightly beaten)
2 cups of Bulgarian Buttermilk
2 cups of Bob's Red Mill Cornmeal (gluten free)
1 T bacon grease
Preheat the oven to 425 degrees. Then melt your butter in the microwave. Add the bacon grease to the melted butter and stir. Put grease mixture aside.
Then mix up your dry ingredients, and add the wet ones. Combine, but don't stir too much. Then as the finishing touch, add the butter and bacon grease. Stir to incorporate and then pour into greased muffin tins. Pour the leftover batter into a greased loaf pan for nice little flat corn cakes.
My muffin tins are not the deep-dish variety, and it takes 13 minutes to cook them in my convection oven. If you have a regular oven, I would add 5 minutes to the baking process.
Result?? They were amazing. Delicious with more depth than the butter-only cornbread. As an added bonus, that one tablespoon of bacon grease worked to hold the cornbread together. It has a good crumb, but not crumbly. PERFECT!! Try this recipe, and you'll begin your love affair with bacon grease (if you haven't already!).
Thursday, September 8, 2011
Harvest pot roast, gone wild
Coastal living in Texas means lots of seafood. It is a mainstay for us during the summer, and I love experimenting with different recipes. We tend to give it a Yucatan flair for the most part, but a big pot of peel 'em and eat 'em shrimp is always a welcome meal. Except in the eyes of my 14yo. He does not like seafood. I think someone switched him in his bassinet at birth, because he is the only one of my 4 children who has seafood avoidance issues. He also does not like going to the beach.....which is where we live. Ahem. Add to that that both his father and I are avid surfers and, well, I rest my case. ;*)
The heat has been brutal here, soaring into the upper 90's up to 104F. That makes it tough to want to cook. I would rather every night be cereal night when we are all melting like that. Thankfully, the last few days we have been greeted with mornings in the 60's! When that happens, I switch gears. School has started, mornings are cool, and it is time for some Fall cooking! We will ignore the fact that it is in the 90's again by 3pm. Bring on the stews, soups and roasts!!
I love using my crock pot. Load it up and I can head out and go surfing guilt free. Dinner is cooking itself while mom has some fun. Yesterday I put a large shoulder roast into my crock pot. I mixed together 2 cups of red wine (I used Fall Creek Vineyards Caberbet Sauvignon.....I also took a tiny sip. Shhhh. I'm Italian and it was 5 o'clock somewhere), 1/2 cup water, 1 package Lipton Onion Soup mix, 1 tsp fresh rosemary, and a couple of unusual spices. It may sound weird, but trust me. They MAKE this roast. Drum roll.....1/8tsp each cloves and allspice. Mixed with the red wine it is superb. Pour this over your roast.
Now, I am feeding 6 people. This includes 2 teenagers, so adjust your amounts as needed on the following:
1-2 peeled and cubed sweet potatoes
1 peeled and cubed acorn squash (make these cubes large so they don't get mushy)
3/4 of a yellow onion, sliced
1 cup sliced raw mushrooms
Put all veggies on top and put the cover on your crock pot. I set mine to high for 4-5 hours, or on low of 8-9.

Yummy!!! Now go surfing! Or swim. Shop. Do the laundry. Whatever floats your boat. I tend to shirk my duties and load my board in the car and head to some surf. My husband surfs obsessively too, so I have his approval. :*)
When you come home, the veggies will not be as bright and pretty. They soak up the dark color of the red wine. Baste them in the juices, then cover it back up and start dessert. For that night I made some brownies so the kids could make brownie sundaes. Yum! I did not make these from scratch. I used Duncan Hines Chewy Fudge brownie mix. I followed the low fat substitution recipe and used only 1 egg, 2 Tb of water and 1/3 cup unsweetened applesauce. They turned out moist and delicious.
Wine for the grownups was Fall Creek Cabernet to compliment the roast, that turned out tender and wonderful! The allspice and cloves gave the veggies an AMAZING flavor!

The veggies are bland looking due to the red wine, but they were seriously the best part of the meal....for me. The kids devoured the roast. There were ZERO left overs.
Onward to dessert!! I made some fresh, homemade whipped cream. So easy, and nothing else will do in our house. It is just too simple to pass up. I pint whipping cream, 3 Tbs of turbinado sugar, 1tsp vanilla. Whip the cream and as it thickens, gradually add in the sugar and vanilla. Continue to beat until the desired thickness, but not too long or it will clump.
Put a brownie on a plate, top with a scoop of vanilla ice cream, drizzle carmel topping over it and then top with whip cream and a cherry!

Yum! Small, adorable, girl-child not included. You will see much more of her. She is always next to the dessert.

See?
 |
| Surfing father. |
The heat has been brutal here, soaring into the upper 90's up to 104F. That makes it tough to want to cook. I would rather every night be cereal night when we are all melting like that. Thankfully, the last few days we have been greeted with mornings in the 60's! When that happens, I switch gears. School has started, mornings are cool, and it is time for some Fall cooking! We will ignore the fact that it is in the 90's again by 3pm. Bring on the stews, soups and roasts!!
I love using my crock pot. Load it up and I can head out and go surfing guilt free. Dinner is cooking itself while mom has some fun. Yesterday I put a large shoulder roast into my crock pot. I mixed together 2 cups of red wine (I used Fall Creek Vineyards Caberbet Sauvignon.....I also took a tiny sip. Shhhh. I'm Italian and it was 5 o'clock somewhere), 1/2 cup water, 1 package Lipton Onion Soup mix, 1 tsp fresh rosemary, and a couple of unusual spices. It may sound weird, but trust me. They MAKE this roast. Drum roll.....1/8tsp each cloves and allspice. Mixed with the red wine it is superb. Pour this over your roast.
Now, I am feeding 6 people. This includes 2 teenagers, so adjust your amounts as needed on the following:
1-2 peeled and cubed sweet potatoes
1 peeled and cubed acorn squash (make these cubes large so they don't get mushy)
3/4 of a yellow onion, sliced
1 cup sliced raw mushrooms
Put all veggies on top and put the cover on your crock pot. I set mine to high for 4-5 hours, or on low of 8-9.

Yummy!!! Now go surfing! Or swim. Shop. Do the laundry. Whatever floats your boat. I tend to shirk my duties and load my board in the car and head to some surf. My husband surfs obsessively too, so I have his approval. :*)
When you come home, the veggies will not be as bright and pretty. They soak up the dark color of the red wine. Baste them in the juices, then cover it back up and start dessert. For that night I made some brownies so the kids could make brownie sundaes. Yum! I did not make these from scratch. I used Duncan Hines Chewy Fudge brownie mix. I followed the low fat substitution recipe and used only 1 egg, 2 Tb of water and 1/3 cup unsweetened applesauce. They turned out moist and delicious.
Wine for the grownups was Fall Creek Cabernet to compliment the roast, that turned out tender and wonderful! The allspice and cloves gave the veggies an AMAZING flavor!

The veggies are bland looking due to the red wine, but they were seriously the best part of the meal....for me. The kids devoured the roast. There were ZERO left overs.
Onward to dessert!! I made some fresh, homemade whipped cream. So easy, and nothing else will do in our house. It is just too simple to pass up. I pint whipping cream, 3 Tbs of turbinado sugar, 1tsp vanilla. Whip the cream and as it thickens, gradually add in the sugar and vanilla. Continue to beat until the desired thickness, but not too long or it will clump.
Put a brownie on a plate, top with a scoop of vanilla ice cream, drizzle carmel topping over it and then top with whip cream and a cherry!

Yum! Small, adorable, girl-child not included. You will see much more of her. She is always next to the dessert.

See?
Tuesday, September 6, 2011
A Taste of Fall Weather
I'm on a Virginia Willis kick, and tonight was no exception. I made her Meme's Vegetable Soup and Cornbread. Both recipes are gluten-free. However, with the cornbread, be sure to use a cornmeal like Bob's Red Mill that is labelled "gluten-free." My only cast-iron skillet is slightly gross, so I used a 12-muffin tin. I poured the leftover cornbread batter into a loaf pan sprayed with cooking oil. This worked great, baked at the same temperature and time as the muffins.
For dessert, I whipped up a Coconut Cake from Annalise Roberts' Gluten-Free Baking Classics. Every cake in that book is fool-proof, and even more moist than cakes with gluten. Coconut milk is used in both the cake and the frosting. It's spectacular! However, be sure to refrigerate this beauty for optimum taste. A side note: I have a convection oven, and it shaves 8 to 13 minutes off the cook time listed in the book. With gluten-free cakes, it's KEY that you don't overcook the cake. Dry cake = fail.
Wine with dinner was Chateau Montelena, a Chardonnay from Napa, 2007 (my favorite vintage for all wines!). I picked it up on sale at King's, so it was an even sweeter deal. My husband had a gin and tonic with his (pictured below), which works just as well.


Subscribe to:
Posts (Atom)